Step-by-Step Guide to Paver Installation for Your Outdoor Space
- Posted on June 20, 2025
Transforming your outdoor space with beautiful, durable pavers is one of the smartest landscaping decisions you can make. Whether you want a stylish patio, a welcoming walkway, or a sturdy driveway, paver installation Manalapan NJ offers a flexible and attractive solution. But how do you get started? And what should you know before diving into the project?
This comprehensive guide will walk you through the step-by-step paver installation process, share expert tips for success, and explain when it’s best to call a professional landscaping contractor or landscaper. Plus, we’ll highlight how proper lawn maintenance ties into keeping your paved areas looking their best.
Why Choose Pavers for Your Outdoor Space?
Before jumping into the installation steps, it helps to understand why pavers are a popular choice:
• Durability: Pavers withstand heavy foot traffic and harsh weather.
• Design versatility: Available in various shapes, colors, and materials.
• Ease of repair: Individual pavers can be replaced if damaged.
• Value boost: Well-installed pavers can increase your home’s curb appeal and property value.
What Tools and Materials Do You Need for Paver Installation?
Getting the right tools and materials will save time and help ensure a smooth project. Here’s a quick checklist:
Tools:
• Tape measure
• Shovel and rake
• Plate compactor (available for rent)
• Level and rubber mallet
• Broom
• Masonry saw or splitter
Materials:
• Pavers (concrete, brick, or natural stone)
• Gravel or crushed stone for the base
• Sand for leveling
• Edging restraints
• Polymeric sand (for joint filling)
How to Prepare Your Outdoor Space for Paver Installation?
Step 1: Plan and Design Your Layout
Begin by sketching your outdoor space and deciding the shape and pattern of your paver layout. Consulting with a landscaping contractor can provide valuable design insights and help avoid costly mistakes.
Step 2: Mark the Area
Use stakes and string or spray paint to mark the boundaries. Consider how the space integrates with your lawn and garden for seamless lawn maintenance later.
Step 3: Excavate the Site
Remove existing grass, soil, and debris to a depth of about 6-8 inches, depending on the paver thickness and expected load.
What Are the Key Steps in the Paver Installation Process?
Step 4: Build a Solid Base
Lay down a 4-6 inch layer of crushed stone or gravel. This base layer ensures proper drainage and stability. Compact it thoroughly using the plate compactor.
Step 5: Add a Sand Layer
Spread a 1-inch layer of coarse sand over the gravel. Level it carefully, as this will be the bedding for your pavers.
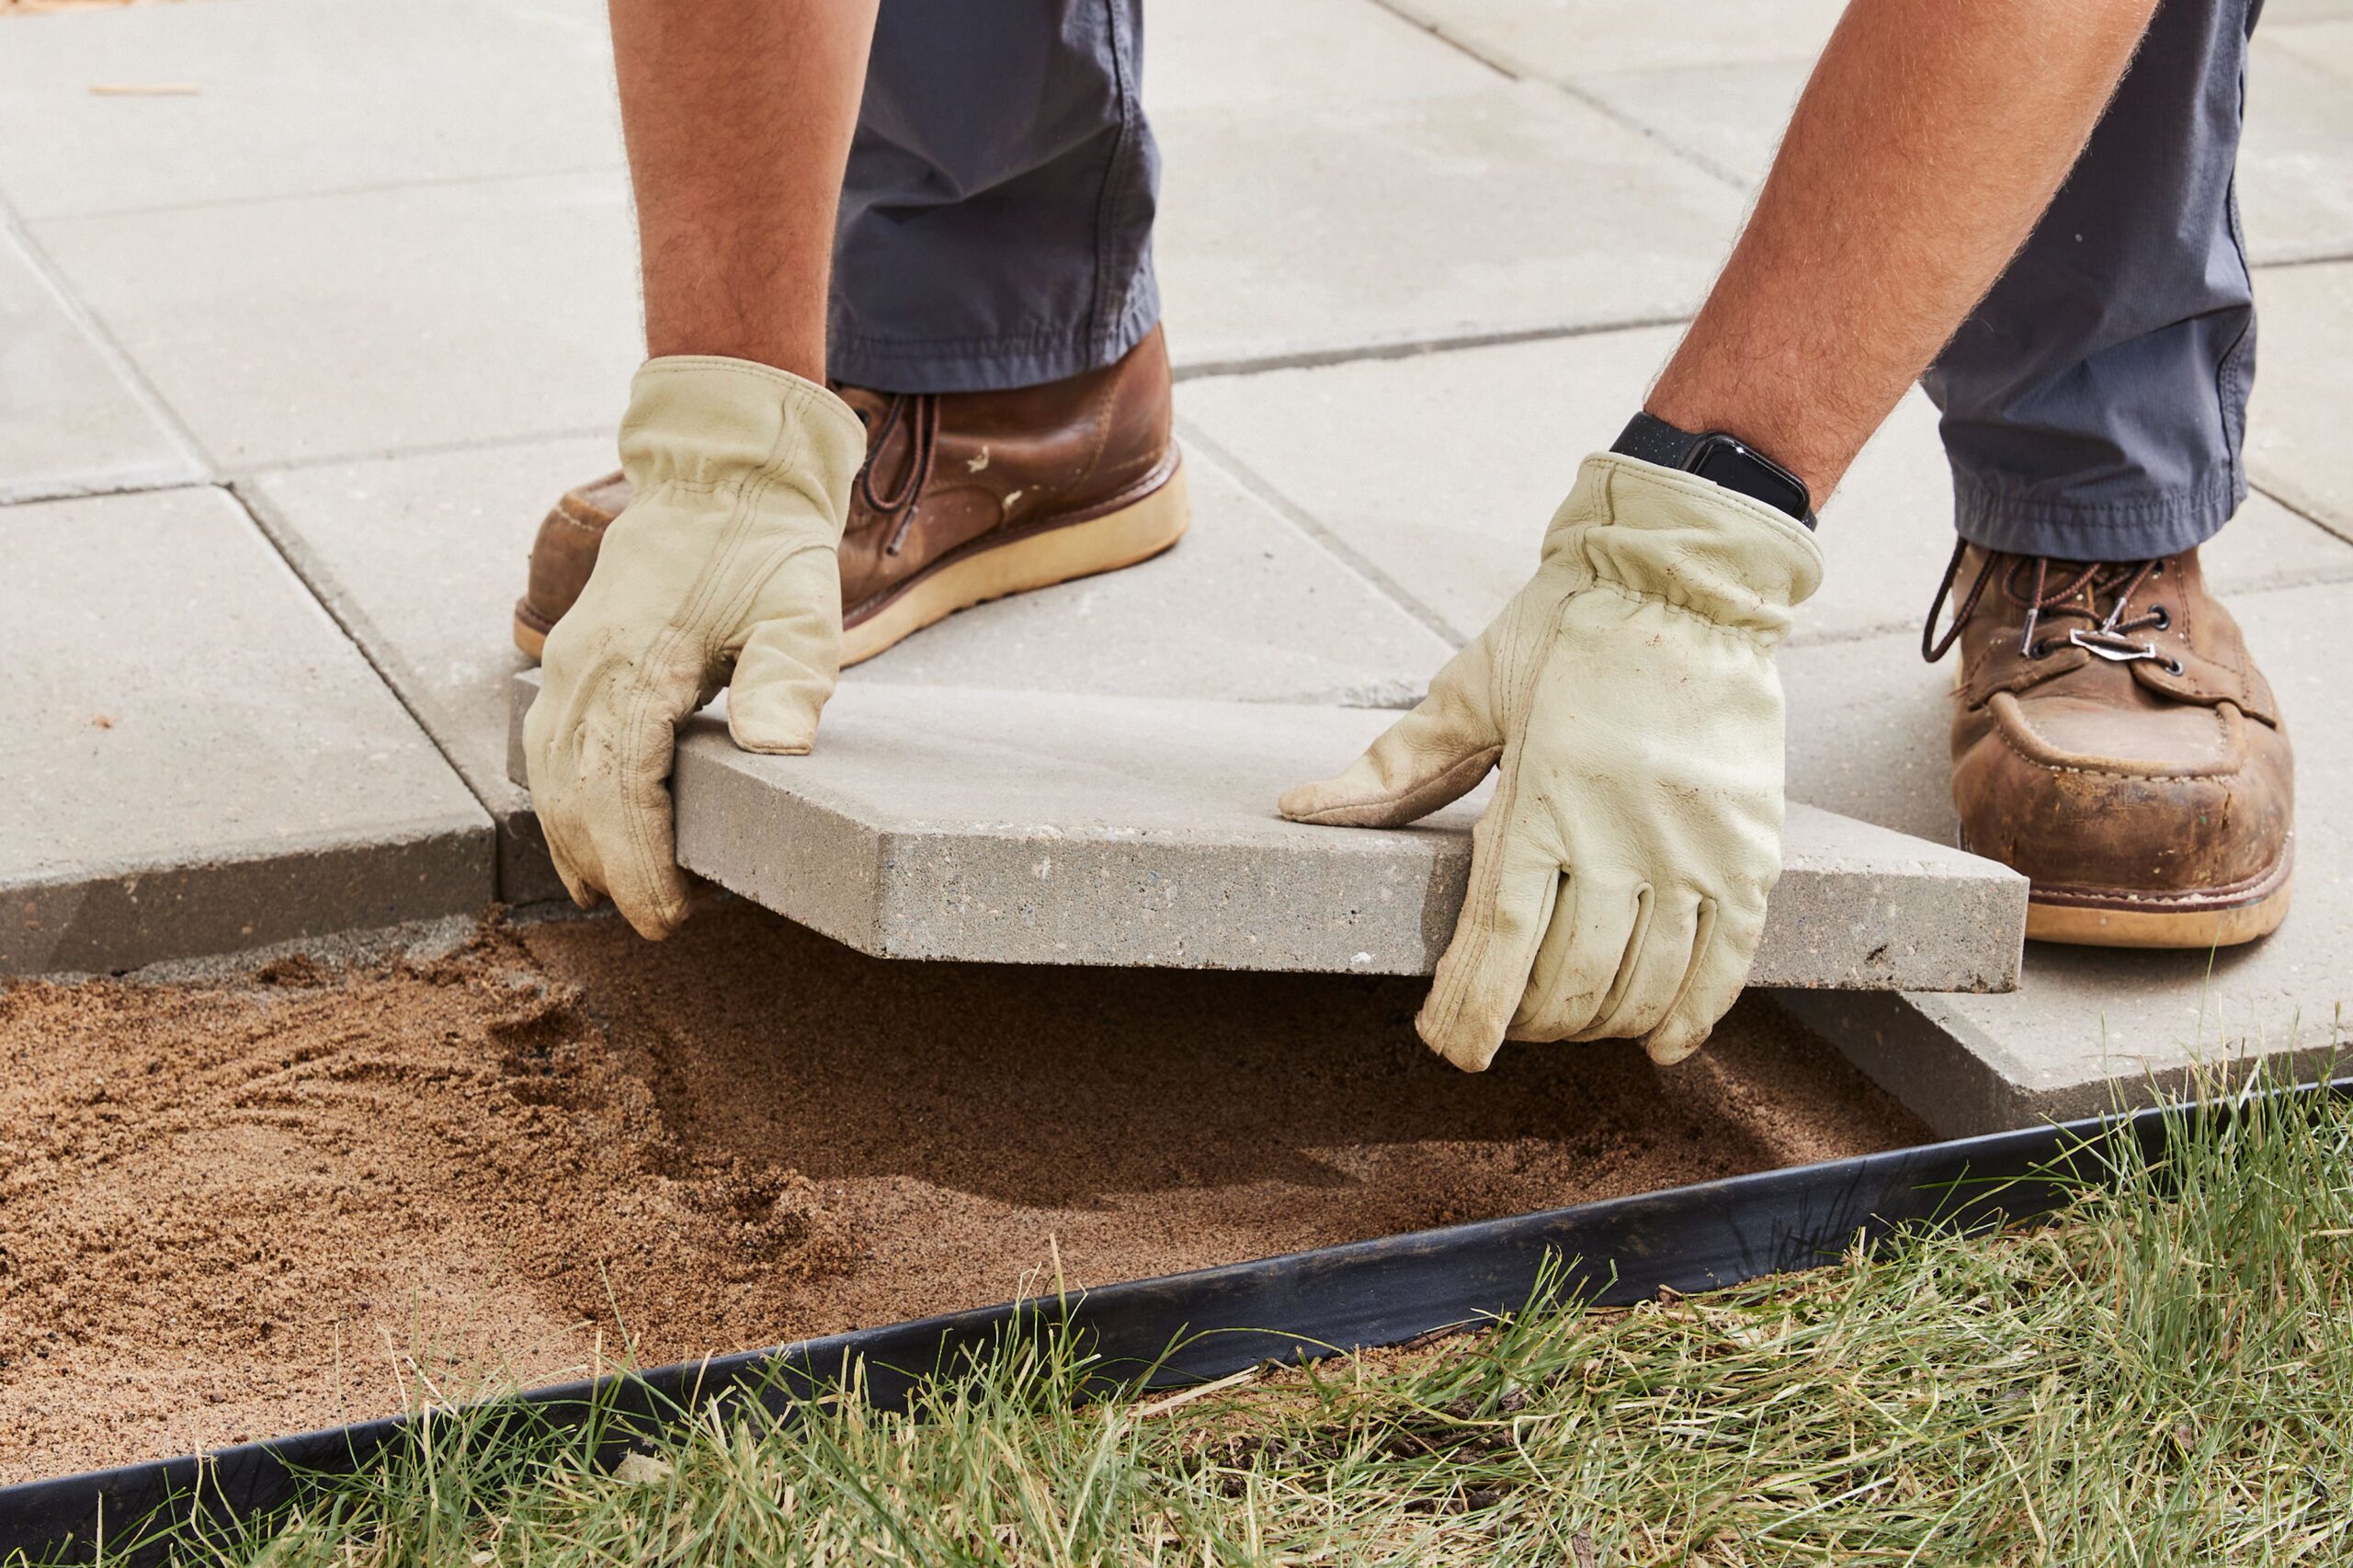
Step 6: Lay the Pavers
Start at a straight edge and place pavers according to your chosen pattern. Use a rubber mallet to gently tap each paver into place, ensuring they sit evenly on the sand.
Step 7: Install Edging
Secure the paver layout by installing plastic or metal edging restraints along the perimeter to prevent shifting.
Step 8: Fill Joints with Polymeric Sand
Sweep polymeric sand into the gaps between pavers. This specialized sand hardens when moistened, locking the pavers in place and preventing weed growth.
Step 9: Compact the Surface
Use the plate compactor again, this time over the entire surface, to settle the pavers and sand firmly.
What Tips Can Help Ensure a Successful Paver Installation?
• Measure twice, dig once: Accurate measurements reduce waste and rework.
• Choose quality materials: Durable pavers and base materials increase longevity.
• Keep the area dry during installation: Excess moisture can cause settling issues.
• Incorporate drainage: Ensure water flows away from structures to avoid pooling.
• Regularly consult a landscaper: Experienced pros can spot potential problems early.
When Should You Hire a Landscaping Contractor or Landscaper?
While DIY paver installation is possible for small projects, hiring a professional landscaper or landscaping contractor can be a smart investment for larger or complex installations. Pros bring:
• Expertise in site preparation and drainage solutions
• Access to specialized equipment
• Knowledge of local codes and permits
• Design guidance to complement your lawn and overall landscape
Partnering with a contractor also means you can focus on lawn maintenance and enjoy your new outdoor space without the stress of installation.
How Does Paver Installation Affect Lawn Maintenance?
Proper paver installation creates clean boundaries between paved and grassy areas, making lawn maintenance easier. For example:
• Pavers prevent grass from encroaching onto walkways or patios.
• Defined edges allow for easier mowing and trimming.
• Good drainage reduces water pooling that can damage both lawn and pavers.
Maintaining a balance between lush grass and hardscape is key to a cohesive, attractive yard.
Conclusion
Installing pavers is a fantastic way to enhance your outdoor living area’s beauty and functionality. With careful planning, the right materials, and attention to detail during each step of the installation process, you can achieve a stunning, durable surface that complements your home and landscape.
If the project feels overwhelming, don’t hesitate to consult a professional landscaper or landscaping contractor. Their expertise will ensure your investment lasts for years and integrates well with your ongoing lawn maintenance efforts.
Ready to get started? Whether you tackle it yourself or hire a pro, following this guide to paver installation Millstone NJ will put you on the path to creating an outdoor space you’ll love coming home to.
Transforming your outdoor space with beautiful, durable pavers is one of the smartest landscaping decisions you can make. Whether you want a stylish patio, a welcoming walkway, or a sturdy driveway, paver installation Manalapan NJ offers a flexible and attractive solution. But how do you get started? And what should you know before diving into…